Добро пожаловать в интегрированную среду разработки visual studiowelcome to the visual studio ide
Содержание:
- Обратная связьGive us feedback
- List of Utilities for Visual Studio 2019
- Step 6 — Install language packs (Optional)
- Агент тестирования Microsoft Visual Studio 2019: требования к системеMicrosoft Visual Studio Test Agent 2019 System Requirements
- Использование компонента Download all, then install (Скачать все и установить)Use the «Download all, then install» feature
- Шаг 8. Начало разработкиStep 8 — Start developing
- Техническая поддержкаGet support
- Следующие шагиNext steps
- Отладка кода
- Совместная работаCollaborate
- Предварительные требованияPrerequisites
- Visual Studio 2017 версии 15.6 или более позднейUpdate Visual Studio 2017 version 15.6 or later
- Управление исходным кодом и совместная работаManage your source code and collaborate with others
- Запуск InstallCleanup.exeRun InstallCleanup.exe
- Шаг 2. Скачивание Visual StudioStep 2 — Download Visual Studio
- Microsoft Visual Studio Build Tools 2019: требования к системеMicrosoft Visual Studio Build Tools 2019 System Requirements
- Настройка конфигурации по умолчанию для Visual StudioSetting a default configuration for Visual Studio
Обратная связьGive us feedback
Зачем отправлять отзыв группе Visual Studio?Why send feedback to the Visual Studio team? Потому что мы серьезно относимся к отзывам клиентов.Because we take customer feedback seriously. Они влияют на многие наши действия.It drives much of what we do.
-
Если вы хотите внести предложение по улучшению Visual Studio, это можно сделать с помощью средства Предложить функцию.If you want to make a suggestion about how we can improve Visual Studio, you can do so by using the Suggest a Feature tool.
-
Если возникает проблема с зависанием или аварийным завершением работы Visual Studio либо иная проблема с производительностью, вы легко можете сообщить нам шаги для воспроизведения проблемы и поделиться вспомогательными файлами с помощью средства Сообщить о проблеме.If you experience an issue where Visual Studio stops responding, crashes, or other performance issue, you can easily share repro steps and supporting files with us by using the Report a Problem tool.
List of Utilities for Visual Studio 2019
This is the «Utilities List» that is referenced in the «Utilities» section of Microsoft Software License Terms for certain editions of Visual Studio 2019 (the «software»).
Depending on the specific edition of the software, the software you received may not include all of the files on this list. To determine your rights with respect to the
following files, please refer to the Visual Studio License Terms that came with your edition of the software. You may not modify these files.
\Common7\IDE\CommonExtensions\Microsoft\IntelliTrace\IntelliTraceCollection.cab
vs_remotetools.exe (x86, x64, ARM64 versions)
\Team Tools\Performance Tools\Setups\vs_profiler\_x64_.exe
Visual C++ Utilities
The «Utilities List» includes the following files within the subfolders of the directories specified:
- \VC\Auxiliary\VS\redist\GraphicsDbgRedist\
- VsGraphicsHelper.dll
- VsGraphicsResources.dll
- \VC\Redist\MSVC\\debug_nonredist\
- concrt140d.dll
- mfc140ud.dll
- mfcm140ud.dll
- msvcp140d.dll
- msvcp140_1d.dll
- msvcp140_2d.dll
- vcamp140d.dll
- vccorlib140d.dll
- vcomp140d.dll
- vcruntime140d.dll
- vcruntime140_1d.dll
- \VC\Tools\MSVC\\bin\
- pgort140.dll
- pgort140ui.dll
- pgosweep.exe
Step 6 — Install language packs (Optional)
By default, the installer program tries to match the language of the operating system when it runs for the first time. To install Visual Studio in a language of your choosing, choose the Language packs tab from the Visual Studio Installer, and then follow the prompts.
Change the installer language from the command line
Another way that you can change the default language is by running the installer from the command line. For example, you can force the installer to run in English by using the following command: . The installer will remember this setting when it is run the next time. The installer supports the following language tokens: zh-cn, zh-tw, cs-cz, en-us, es-es, fr-fr, de-de, it-it, ja-jp, ko-kr, pl-pl, pt-br, ru-ru, and tr-tr.
Агент тестирования Microsoft Visual Studio 2019: требования к системеMicrosoft Visual Studio Test Agent 2019 System Requirements
Агент тестирования Visual Studio поддерживает те же требования к системе, что и Visual Studio, со следующими изменениями.Visual Studio Test Agent supports the same system requirements as Visual Studio with the following changes:
- Требуется процессор с тактовой частотой не ниже 2,6 ГГцRequires a 2.6 GHz or faster processor. Рекомендуется использовать как минимум четырехъядерный процессор.Quad core or better recommended
- Требуется 4 ГБ ОЗУ или больше для создания нагрузкиRequires 4 GB of RAM or higher for load generation
- Требуется 10 ГБ пространства на жестком дискеRequires 10 GB of hard disk space
Использование компонента Download all, then install (Скачать все и установить)Use the «Download all, then install» feature
: скачав веб-установщик, выберите в Visual Studio Installer вариант Скачать все и установить.: After you download the web installer, select the new Download all, then install option from the Visual Studio Installer. После этого продолжите установку.Then, continue with your installation.
загрузив веб-установщик, выберите в установщике Visual Studio Installer новый компонент Download all, then install (Скачать все и установить).After you download the web installer, select the new Download all, then install option from the Visual Studio Installer. После этого продолжите установку.Then, continue with your installation.
Параметр Download all, then install (Скачать все и установить) позволяет скачать Visual Studio в виде отдельного установщика для компьютера, на который он скачивается.We designed the «Download all, then install» feature so that you can download Visual Studio as a single installation for the same computer on which you downloaded it. Это позволяет безопасно отключится от Интернета перед установкой Visual Studio.That way, you can safely disconnect from the web before you install Visual Studio.
Важно!
Не используйте этот параметр, чтобы создать автономный кэш для передачи на другой компьютер.Do not use the «Download all, then install» feature to create an offline cache that you intend to transfer to another computer. Он не предназначен для этого.It’s not designed to work that way. Если вы хотите создать автономный кэш на локальном компьютере, который затем можно использовать для установки Visual Studio, см. раздел ниже.If you want to create an offline cache on the local computer that you can then use to install Visual Studio, see the section below. На странице Создание сетевой установки Visual Studio также содержатся сведения о том, как создать кэш в сети.Alternatively, the Create a network installation of Visual Studio page provides information about how to create a cache on the network.
Шаг 8. Начало разработкиStep 8 — Start developing
-
Когда установка Visual Studio завершится, нажмите кнопку Запустить, чтобы приступить к разработке в Visual Studio.After Visual Studio installation is complete, choose the Launch button to get started developing with Visual Studio.
-
Выберите Файл, а затем Создать проект.Choose File, and then choose New Project.
-
Выберите тип проекта.Select a project type.
Например, чтобы создать приложение C++, нажмите Установленные, разверните узел Visual C++ , а затем выберите тип проекта C++, который нужно создать.For example, to build a C++ app, choose Installed, expand Visual C++, and then choose the C++ project type that you want to build.
Чтобы создать приложение C#, нажмите Установленные, разверните узел Visual C# , а затем выберите тип проекта C#, который нужно создать.To build a C# app, choose Installed, expand Visual C#, and then choose the C# project type that you want to build.
-
Когда установка Visual Studio завершится, нажмите кнопку Запустить, чтобы приступить к разработке в Visual Studio.After Visual Studio installation is complete, choose the Launch button to get started developing with Visual Studio.
-
На начальном экране выберите Создать проект.On the start window, choose Create a new project.
-
В поле поиска введите тип приложения, которое вы хотите создать, чтобы просмотреть список доступных шаблонов.In the search box, enter the type of app you want to create to see a list of available templates. Список шаблонов зависит от рабочих нагрузок, выбранных во время установки.The list of templates depends on the workload(s) that you chose during installation. Чтобы просмотреть различные шаблоны, выберите разные рабочие нагрузки.To see different templates, choose different workloads.
Можно также фильтровать поиск по определенному языку программирования с помощью раскрывающегося списка Язык.You can also filter your search for a specific programming language by using the Language drop-down list. Вы также можете выбирать фильтры из списка Платформа и Тип проекта.You can filter by using the Platform list and the Project type list, too.
-
Новый проект откроется в Visual Studio, и вы можете приступить к написанию кода!Visual Studio opens your new project, and you’re ready to code!
Техническая поддержкаGet support
Иногда возникают проблемы.Sometimes, things can go wrong. Если установить Visual Studio не удается, воспользуйтесь пошаговыми указаниями в статье Устранение неполадок при установке и обновлении Visual Studio.If your Visual Studio installation fails, see Troubleshoot Visual Studio installation and upgrade issues for step-by-step guidance.
Также доступен , предназначенный для оказания помощи при проблемах с установкой (только на английском языке).We also offer an (English only) support option for installation-related issues.
Ниже приведены несколько дополнительных вариантов:Here are a few more support options:
- Вы можете сообщить о проблемах с продуктом, используя средство Сообщить о проблеме. Оно доступно как в Visual Studio Installer, так и в IDE Visual Studio.Report product issues to us via the Report a Problem tool that appears both in the Visual Studio Installer and in the Visual Studio IDE.
- Вы можете предлагать новые функции, просматривать описания проблем и искать решения в сообществе разработчиков Visual Studio.Suggest a feature, track product issues, and find answers in the Visual Studio Developer Community.
- Вы также можете связаться с нами и другими разработчиками Visual Studio, используя свою учетную запись GitHub в обсуждении Visual Studio в сообществе Gitter.Use your GitHub account to talk to us and other Visual Studio developers in the Visual Studio conversation in the Gitter community.
Следующие шагиNext steps
Узнайте больше о Visual Studio, прочитав одну из следующих вводных статей:Explore Visual Studio further by following along with one of these introductory articles:
-
Познакомьтесь с редактором кода в статье Сведения об использовании редактора кодаGet acquainted with the code editor in Learn to use the code editor
-
Узнайте, как Visual Studio упорядочивает код, в статье Сведения о проектах и решенияхLearn how Visual Studio organizes code in Learn about projects and solutions
Если вы готовы к углубиться в вопросы написания кода, ознакомьтесь со следующими статьями о конкретных языках:If you’re ready to dive into more coding, one of the following language-specific quickstarts is a good next step:
Отладка кода
Для того чтобы запустить код в VS Code, нам нужно воспользоваться одним из расширений. Например, для JavaScript подойдет Debugger for Chrome. Узнать, какое расширение необходимо для конкретного языка, можно через «Выполнить» -> «Установить дополнительные отладчики…».
В результате в левой части окна будет отображен список доступных плагинов – найдите в нем подходящий для вас и следуйте инструкции.
После того как нужный плагин будет установлен, можно запускать отладку кода. Для этого достаточно открыть пункт «Выполнить» и нажать на кнопку «Запустить отладку». Также это можно сделать с помощью клавиши «F5».
С помощью плагинов мы можем отладить код, написанный на любом языке программирования.
Совместная работаCollaborate
Посмотрите видео ниже, чтобы узнать, как решать проблемы совместно с другими специалистами.View the following video to learn more about how you can team up to solve issues. Длительность видео: 4:22 мин.Video length: 4.22 minutes
Рабочий процесс Git-firstGit-first workflow
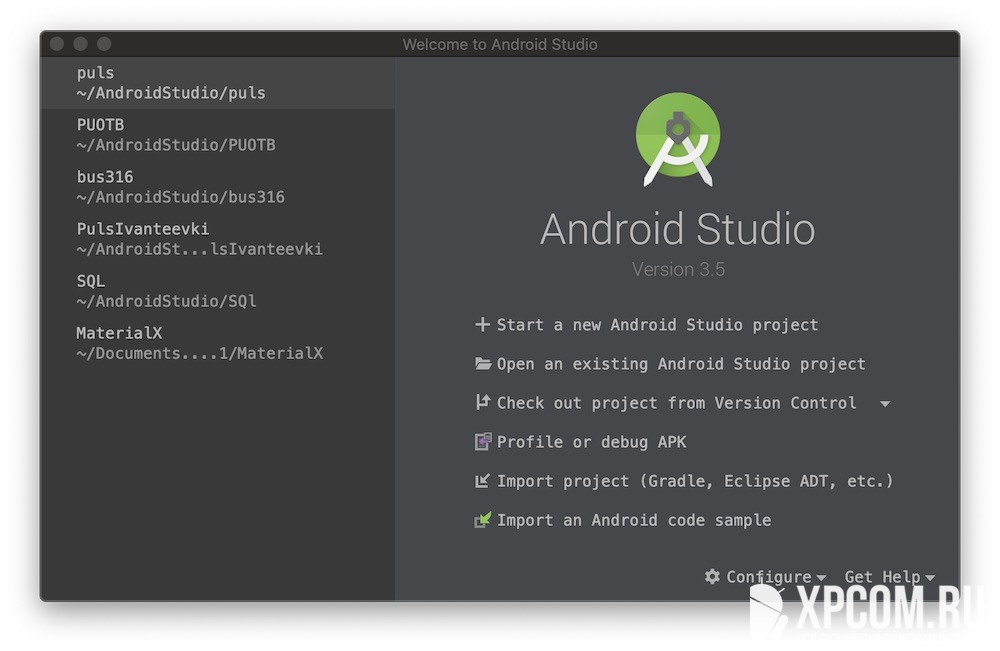
Первое, что вы заметите при открытии Visual Studio 2019, — новое окно запуска.Something you’ll notice when you open Visual Studio 2019 is its new start window.
С помощью этого окна запуска можно быстро перейти к коду несколькими способами.The start window presents you with several options to get you to code quickly. Мы включили возможность клонирования или извлечения кода из репозитория.We’ve placed the option to clone or check out code from a repo, first.
Окно запуска также позволяет открыть проект, решение и локальную папку или создать новый проект.The start window also includes options to open a project or solution, open a local folder, or create a new project.
Дополнительные сведения см. в записи блога Приступая к написанию кода: Как мы разработали новое окно запуска Visual Studio.For more information, see the Get to code: How we designed the new Visual Studio start window blog post.
Производительность GitGit productivity
Новые возможности в версии 16.8: Теперь GIT является интерфейсом системы управления версиями по умолчанию в Visual Studio 2019.New in 16.8: Git is now the default version control experience in Visual Studio 2019. Мы разработали набор функций на основе ваших отзывов за два прошлых выпуска.We have built out the feature set and iterated on it based on your feedback during the past two releases. Теперь новый интерфейс включен по умолчанию для всех пользователей.The new experience has now been turned on by default for everyone. В новом меню Git можно клонировать, создавать или открывать репозитории.From the new Git menu, you can clone, create, or open repositories. Используйте интегрированные окна инструментов Git для фиксации и отправки изменений в код, управления ветвями, отслеживания изменений удаленных репозиториев и разрешения конфликтов слияния.Use the integrated Git tool windows to commit and push changes to your code, manage branches, stay up to date with your remote repositories, and resolve merge conflicts.
Дополнительные сведения см. в статье Новый интерфейс в Visual Studio.For more information, see the Git experience in Visual Studio page.
Visual Studio Live Share — это служба для разработчиков, которая позволяет предоставить базу кода и соответствующий контекст коллеге и обеспечить двунаправленное взаимодействие непосредственно из среды Visual Studio.Visual Studio Live Share is a developer service that allows you to share a codebase and its context with a teammate and get instant bidirectional collaboration directly from within Visual Studio. Благодаря Live Share коллега может легко и безопасно просматривать, изменять и отлаживать проект, предоставленный вами для общего доступа.With Live Share, a teammate can read, navigate, edit, and debug a project that you’ve shared with them, and do so seamlessly and securely.
В Visual Studio 2019 эта служба устанавливается по умолчанию.And with Visual Studio 2019, this service is installed by default.
Дополнительные сведения см. в разделе Visual Studio Live Share для проверки кода в режиме реального времени и интерактивного обучения записи блога и Live Share, теперь включены с помощью Visual Studio 2019 записи блога.For more information, see the Visual Studio Live Share for real-time code reviews and interactive education blog post and the Live Share now included with Visual Studio 2019 blog post.
Интегрированная проверка кодаIntegrated code reviews
Мы представляем новое расширение, которое можно скачать для использования в Visual Studio 2019.We’re introducing a new extension that you can download to use with Visual Studio 2019. С помощью этого нового расширения можно просматривать, запускать и даже выполнять отладку запросов на вытягивание, не выходя из Visual Studio.With this new extension, you can review, run, and even debug pull requests from your team without leaving Visual Studio. Мы включили поддержку кода в репозиториях GitHub и DevOps в Azure.We support code in both GitHub and Azure DevOps repositories.
Дополнительные сведения см. в записи блога Проверка кода с помощью расширения для запросов на вытягивание в Visual Studio.For more information, see the Code reviews using the Visual Studio Pull Requests extension blog post.
Предварительные требованияPrerequisites
- Docker DesktopDocker Desktop
- Visual Studio 2019 с рабочей нагрузкой Веб-разработка, Средства Azure и (или) Кроссплатформенная разработка .NET Core.Visual Studio 2019 with the Web Development, Azure Tools workload, and/or .NET Core cross-platform development workload installed
- Средства разработки .NET Core для разработки с использованием .NET Core..NET Core Development Tools for development with .NET Core.
- Для публикации в Реестр контейнеров Azure требуется подписка Azure.To publish to Azure Container Registry, an Azure subscription. Зарегистрируйтесь для получения бесплатной пробной версии.Sign up for a free trial.
Visual Studio 2017 версии 15.6 или более позднейUpdate Visual Studio 2017 version 15.6 or later
Мы ускорили процесс установки и обновления, чтобы его можно выполнять непосредственно в интегрированной среде разработки.We’ve streamlined the installation and update experience to make it easier to use directly from within the IDE. Вот как можно обновить версию 15.6 и более поздние версии до последней версии Visual Studio.Here’s how to update from version 15.6 and later to newer versions of Visual Studio.
Использование Центра уведомленийUsing the Notifications hub
При наличии обновлений в Visual Studio отображается соответствующий флаг уведомления.When there’s an update, there’s a corresponding notification flag in Visual Studio.
-
Сохраните результаты своих действий.Save your work.
-
Выберите флаг уведомления, чтобы открыть центр уведомлений, а затем выберите уведомление, которое вы хотите установить.Choose the notification flag to open the Notifications hub, and then choose the update that you want to install.
Совет
Обновление для выпуска Visual Studio 2017 является накопительным, поэтому всегда выбирайте для установки то, у которого новейший номер версии.An update for an edition of Visual Studio 2017 is cumulative, so always choose to install the one with the most recent version number.
-
Когда откроется диалоговое окно Обновление, выберите Обновить сейчас.When the Update dialog box opens, choose Update Now.
Если откроется диалоговое окно управления доступом пользователя, выберите Да.If a User Access Control dialog box opens, choose Yes. Затем на некоторое время может открыться диалоговое окно с сообщением «Пожалуйста, подождите». Затем откроется Visual Studio Installer, чтобы начать обновление.Next, a «Please wait» dialog might open for a moment, and then the Visual Studio Installer opens to start the update.
Обновление продолжается.Your update continues. Когда обновление завершится, Visual Studio перезапустится.Then, when it’s complete, Visual Studio restarts.
Примечание
Если вы запускаете Visual Studio с правами администратора, вручную перезапустите его после обновления.When you run Visual Studio in administrator mode, you must manually restart Visual Studio after the update.
Использование интегрированной среды разработкиUsing the IDE
Можно проверить наличие обновлений и установить из в строке меню Visual Studio.You can check for an update and then install the update from the menu bar in Visual Studio.
-
Сохраните результаты своих действий.Save your work.
-
Выберите Справка > Проверка обновлений.Choose Help > Check for Updates.
-
Когда откроется диалоговое окно Обновление, выберите Обновить сейчас.When the Update dialog box opens, choose Update Now.
Как описано в предыдущем разделе, Visual Studio перезагружается после успешного завершения обновления.The update proceeds as described in the previous section, and then Visual Studio restarts after the update completes successfully.
Примечание
Если вы запускаете Visual Studio с правами администратора, вручную перезапустите его после обновления.When you run Visual Studio in administrator mode, you must manually restart Visual Studio after the update.
Использование Visual Studio InstallerUsing the Visual Studio Installer
Как и в предыдущих версиях Visual Studio, для установки обновлений можно использовать Visual Studio Installer.As in earlier versions of Visual Studio, you can use the Visual Studio Installer to install an update.
-
Сохраните результаты своих действий.Save your work.
-
Запустите установщик.Open the installer. Прежде чем продолжить, может потребоваться обновить Visual Studio Installer.The Visual Studio Installer might require updating before you continue.
Примечание
На компьютере под управлением Windows 10 установщик можно найти в списке по букве V (Установщик Visual Studio) или по букве M (Установщик Microsoft Visual Studio).On a computer running Windows 10, you can find the installer under the letter V as the Visual Studio Installer, or under the letter M as the Microsoft Visual Studio Installer.
-
На странице Продукт установщика найдите установленный ранее выпуск Visual Studio.On the Product page in the installer, look for the edition of Visual Studio that you installed previously.
-
Если обновление доступно, вы увидите кнопку Обновить.If an update is available, you see an Update button. (Поиск доступных обновлений может занять несколько секунд.)(It might take a few seconds for the installer to determine whether an update is available.)
Чтобы установить обновления, нажмите кнопку Обновить.Choose the Update button to install the updates.
Управление исходным кодом и совместная работаManage your source code and collaborate with others
Вы можете управлять исходным кодом в репозиториях Git, размещенных любым поставщиком, в том числе и GitHub.You can manage your source code in Git repos hosted by any provider, including GitHub. С помощью Azure DevOps Services можно управлять кодом, а также ошибками и рабочими элементами для всего проекта.Or use Azure DevOps Services to manage code alongside bugs and work items for your whole project. Дополнительные сведения об управлении репозиториями Git в Visual Studio с использованием Team Explorer см. в статье Приступая к работе с Git и Azure Repos.See Get started with Git and Azure Repos to learn more about managing Git repos in Visual Studio using Team Explorer. В Visual Studio также предусмотрены другие встроенные элементы управления исходным кодом.Visual Studio also has other built-in source control features. Дополнительные сведения о них см. в статье блога Новые возможности Git в Visual Studio.To learn more about them, see New Git features in Visual Studio (blog).
Служба Azure DevOps Services — это облачные службы для планирования, размещения, автоматизации и развертывания программного обеспечения, а также совместной работы в группах.Azure DevOps Services are cloud-based services to plan, host, automate, and deploy software and enable collaboration in teams. Службы Azure DevOps поддерживают репозитории Git (распределенное управление версиями) и систему управления версиями Team Foundation (централизованное управление версиями).Azure DevOps Services support both Git repos (distributed version control) and Team Foundation Version Control (centralized version control). Они поддерживают конвейеры непрерывной сборки и поставки (CI/CD) кода, хранящегося в системах управления версиями.They support pipelines for continuous build and release (CI/CD) of code stored in version control systems. Службы Azure DevOps Services также поддерживают методологии разработки программного обеспечения Agile, Scrum и CMMI.Azure DevOps Services also support Scrum, CMMI and Agile development methodologies.
Team Foundation Server (TFS) — это центр управления жизненным циклом приложений для Visual Studio.Team Foundation Server (TFS) is the application lifecycle management hub for Visual Studio. Он позволяет всем лицам, участвующим в процессе разработки, использовать единое решение.It enables everyone involved with the development process to participate using a single solution. TFS также полезен для управления разнородными командами и проектами.TFS is useful for managing heterogeneous teams and projects, too.
При наличии организации Azure DevOps или Team Foundation Server в сети к ним можно подключиться из окна Team Explorer в Visual Studio.If you have an Azure DevOps organization or a Team Foundation Server on your network, you connect to it through the Team Explorer window in Visual Studio. В этом окне можно извлекать и возвращать код в систему управления версиями, управлять рабочими элементами, запускать сборки и получать доступ к комнатам команд и рабочим областям.From this window you can check code into or out of source control, manage work items, start builds, and access team rooms and workspaces. Team Explorer можно открыть с помощью поля поиска или из главного меню Вид > Team Explorer или Команда > Управление подключениями.You can open Team Explorer from the search box, or on the main menu from View > Team Explorer or from Team > Manage Connections.
На изображении ниже показано окно Team Explorer для решения, размещенного в Azure DevOps Services.The following image shows the Team Explorer window for a solution that is hosted in Azure DevOps Services.
Вы также можете автоматизировать процедуру сборки, чтобы обеспечить сборку кода, который разработчики в вашей рабочей группе вернули в систему управления версиями.You can also automate your build process to build the code that the devs on your team have checked into version control. Например, можно создавать один или более проектов каждую ночь или всякий раз при возврате кода.For example, you can build one or more projects nightly or every time that code is checked in. Дополнительные сведения см. в описании Azure Pipelines.For more information, see Azure Pipelines.
Запуск InstallCleanup.exeRun InstallCleanup.exe
Со средством можно использовать любой из следующих параметров командной строки:You can use either of the following command-line switches with the tool:
| ПараметрSwitch | ПоведениеBehavior |
|---|---|
| Этот параметр используется по умолчанию, если не переданы другие параметры.This switch is the default if no other switch is passed. Он приводит к удалению только главного каталога установки и сведений о продукте.It removes only the main installation directory and product information. Используйте этот параметр, если после запуска средства вы планируете переустановить ту же версию Visual Studio.Use this switch if you intend to reinstall the same version of Visual Studio after you run the tool. | |
| Этот параметр приводит к удалению главного каталога установки, сведений о продукте и большинства других компонентов, которые установлены вне каталога установки и могут использоваться другими экземплярами Visual Studio или иными продуктами.This switch removes the main installation directory, product information, and most other features installed outside the installation directory, that might also be shared with other Visual Studio installations or other products. Используйте этот параметр, если вы планируете удалить среду Visual Studio и не устанавливать ее повторно.Use this switch if you intend to remove Visual Studio without reinstalling it later. |
Ниже описано, как запустить средство .Here’s how to run the tool:
-
Закройте Visual Studio Installer.Close the Visual Studio Installer.
-
Откройте командную строку от имени учетной записи администратора.Open an administrator command prompt. Чтобы открыть командную строку с правами администратора, выполните указанные ниже действия.To open an administrator command prompt, follow these steps:
- Введите cmd в поле «Введите текст для поиска».Type cmd in the «Type here to search» box.
- Щелкните правой кнопкой мыши пункт Командная строка и выберите команду Запуск от имени администратора.Right-click Command Prompt, and then choose Run as administrator.
-
Введите полный путь к средству и добавьте предпочитаемый параметр командной строки.Enter the full path of the tool and add the command-line switch you prefer. По умолчанию путь средства выглядит следующим образом.By default, the path of the tool is as follows. В двойные кавычки заключаются команды, содержащие пробелы:The double quotes enclose a command containing spaces:
Примечание
Если вы не можете найти средство в каталоге Visual Studio Installer, который всегда находится в , ниже описаны дальнейшие действия.If you can’t find under the Visual Studio Installer directory, which is always located at , here’s what to do next. Следуйте инструкциям для установки Visual Studio.Follow the instructions to install Visual Studio. Затем, когда отобразится экран выбора рабочих нагрузок, закройте окно и снова выполните шаги, описанные на этой странице.Then, when the workload selection screen is displayed, close the window and follow the steps on this page again.
Шаг 2. Скачивание Visual StudioStep 2 — Download Visual Studio
Теперь скачайте файл начального загрузчика Visual Studio.Next, download the Visual Studio bootstrapper file.
Сведения о том, как получить начальный загрузчик для Visual Studio 2017, см. на странице скачиваемых материалов Предыдущие версии Visual Studio.To get a bootstrapper for Visual Studio 2017, see the Visual Studio previous versions download page for details on how to do so.
Для этого нажмите кнопку ниже, выберите нужный выпуск Visual Studio, щелкните Сохранить, а затем Открыть папку.To do so, choose the following button, choose the edition of Visual Studio that you want, choose Save, and then choose Open folder.
Microsoft Visual Studio Build Tools 2019: требования к системеMicrosoft Visual Studio Build Tools 2019 System Requirements
Для Build Tools предъявляются те же требования к системе, что и для Visual Studio, со следующими отличиями.The Build Tools support the same system requirements as Visual Studio with the following changes:
- Также устанавливается на Windows Server 2008 R2 с пакетом обновления 1 (SP1)Also installs on Windows Server 2008 R2 SP1.
- Также устанавливается в рамках установки основных серверных компонентов (Server Core) для Windows Server 2016 и Windows Server 2019.Also installs on the Server Core option for Windows Server 2016 and Windows Server 2019.
- Также устанавливается в контейнер Windows.Also installs into a Windows container.
- Требуется от 2,3 до 60 ГБ доступного места на диске в зависимости от установленных компонентов.Requires 2.3 GB to 60 GB of available hard disk space, depending on installed features.
Настройка конфигурации по умолчанию для Visual StudioSetting a default configuration for Visual Studio
Когда вы с помощью команды создаете кэш макета сетевой установки, в этом макете создается первоначальный файл .If you created a network layout cache with the , an initial file is created in the layout. При создании частичного макета этот файл ответов содержит рабочие нагрузки и языки, которые были включены в макет.If you create a partial layout, this response file includes the workloads and languages that were included in the layout. Когда программа установки запускается из папки макета, она автоматически использует файл response.json, который выбирает рабочие нагрузки и компоненты, включенные в макет.Running setup from this layout automatically uses this response.json file, which selects the workloads and components included in the layout. Пользователи могут по-прежнему выбирать или отменять выбор рабочих нагрузок в пользовательском интерфейсе программы установки перед установкой Visual Studio.Users can still select or unselect any workloads in the setup UI before installing Visual Studio.
Администраторы, создающие макет, могут изменить файл в макете, чтобы задать другие параметры по умолчанию, которые будут предложены пользователям при установке Visual Studio на основе макета.Administrators who create a layout can modify the file in the layout to control the default settings that their users see when they install Visual Studio from the layout. Например, если администратор хочет по умолчанию устанавливать конкретные рабочие нагрузки и компоненты, он может добавить их в файл .For example, if an administrator wants specific workloads and components installed by default, they can configure the file to add them.
Когда программа установки Visual Studio запускается из папки макета, она автоматически использует файл ответов, содержащийся в этой папке.When Visual Studio setup is run from a layout folder, it automatically uses the response file in the layout folder. Параметр использовать необязательно.You don’t have to use the option.
Вы можете изменить файл , созданный в папке автономного макета, чтобы определить настройки по умолчанию для пользователей, выполняющих установку из этого макета.You can update the file that is created in an offline layout folder to define the default setting for users who install from this layout.
Предупреждение
Вам нужно обязательно оставить в нем все существующие свойства, которые были определены при создании макета.It’s critical that you leave the existing properties that were defined when the layout was created.
Базовый файл в макете должен выглядеть примерно так, как представлено ниже, но значения продукта и канала будут соответствовать условиям вашей установки.The base file in a layout should look similar to the following example, except that it would include the value for the product and channel that you want to install:
При создании или обновлении макета также создается файл response.template.json.When you create or update a layout, a response.template.json file is also created. Этот файл содержит все идентификаторы всех рабочих нагрузок, компонентов и языков, которые могут использоваться.This file contains all of the workload, component, and language IDs that can be used. Этот файл предоставляется в виде шаблона для всего содержимого, которое может быть включено в настраиваемую установку.This file is provided as a template for what all could be included in a custom install. Администраторы могут использовать этот файл в качестве отправной точки для пользовательского файла ответов.Administrators can use this file as a starting point for a custom response file. Просто удалите идентификаторы тех компонентов, которые не нужно устанавливать, и сохраните их в собственном файле ответов.Just remove the IDs for the things you do not want to install and save it in your own response file. Не настраивайте файл response.template.json файла, или изменения будут потеряны при каждом обновлении макета.Do not customize the response.template.json file or your changes will be lost whenever the layout is updated.